Black Desert Online: How to Use Nodes and Workers
In previous articles, I’ve tried to emphasize just how big Black Desert Online is. Not only is the map huge (and can’t be fast traveled around), there are so many different systems that interlock. There could be whole guides dedicated to even the simplest task or life skill. In a previous article, we covered a beginner’s guide to Nodes. These are the lifeblood of Black Desert in many respects. They’re points on the map, allow you to set up trade routes, and farm for materials. So many other mechanics in the game rely on them. However, BDO doesn’t always do the best job of explaining them to new players.

In the previous guide, we covered details of the different types of Nodes and how you can interact with them. Workers were mentioned briefly, but again this whole system really needs a guide of its own. Successfully setting up a Node and worker empire can bring you huge sums of passive income. However, it’s not an easy task by any means. In this article, I’ll cover the basics of workers. This includes how to hire and deploy them, the different types of worker, how they can be leveled up and exchanged, and how to manage a system of them effectively.
An Introduction to Nodes
I covered Nodes in a previous guide. And even then, it was only the basics. Each segment could probably have its own full article. However, I’ll refresh the essentials here in relation to workers. Nodes are points on the Black Desert Online map that players can invest Contribution Points (CP) and Energy in. Doing so allows you to connect Nodes to form trade routes, farm the land’s resources, and gives benefits to item drop rate in the area. It’s easy to invest in a Node from either the world map or the Node Manager. Any contribution points you invest will be refunded if you withdraw it, while energy points are gone forever.
There are many different kinds of Nodes; adventure Nodes such as towns, cities, gateways, and danger areas, and production Nodes for farming, mining, and investing. Discovering adventure Nodes and unlocking them allows you to then unlock the attached production Nodes. It is in these areas that you can employ workers to gather resources from the land. The system may sound complex, and the intricacies certainly can be, but essentially it’s a straightforward process. You discover Nodes, unlock them with CP, unlock the associated production Nodes, and set workers to work on them.
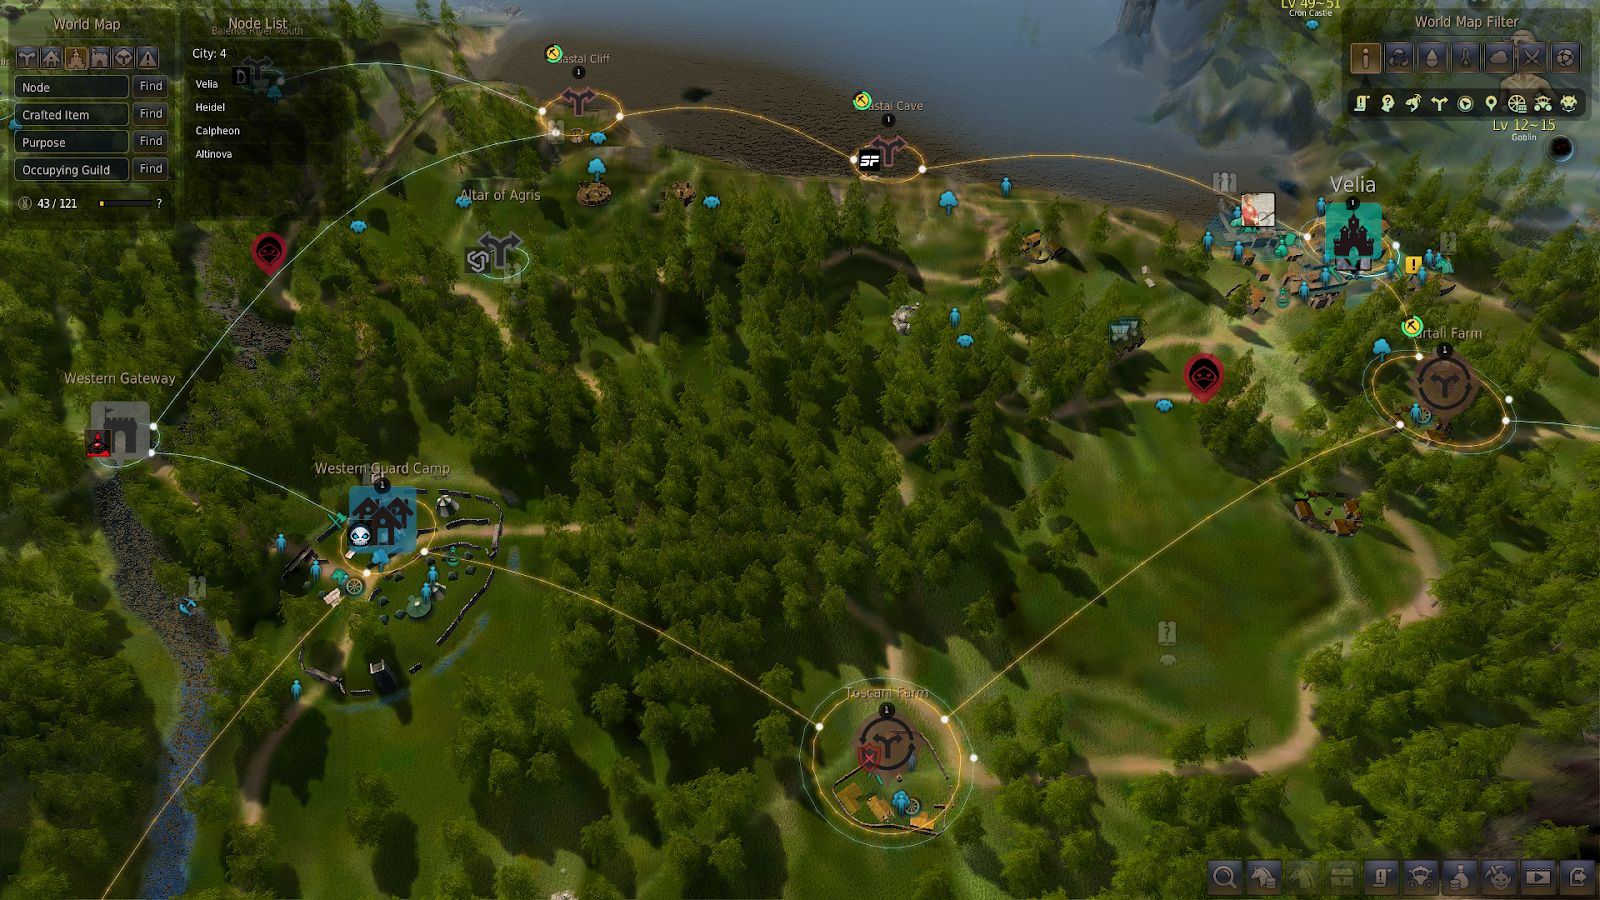
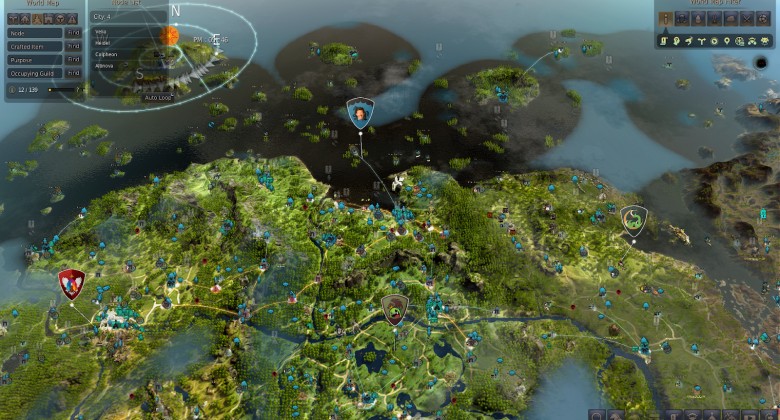
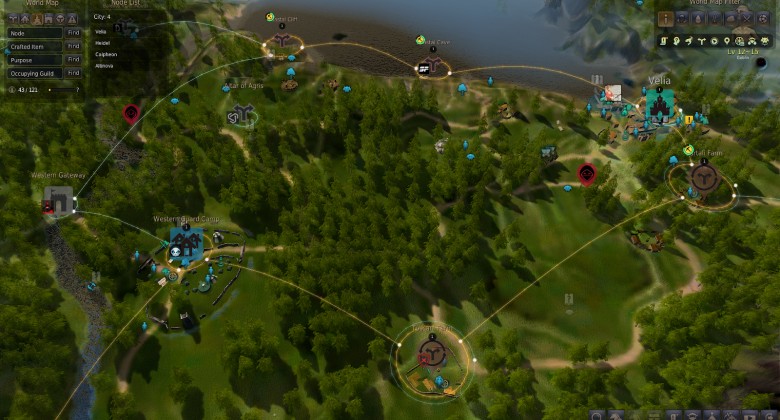
Nodes create a network for production and trade and can be linked together.
The Black Desert Online map is colossal, and there are an equally large number of attached Nodes. Because you need to invest CP into them, and there’s a soft cap on the amount of CP, it’s impossible to invest in every Node and have a worker on it. However, the more you explore, fight, and quest, the more CP you can gain. Your Node empire will grow the more you actively play.
An Introduction to Workers
Workers are what make Nodes profitable. They are NPCs that you can hire, with their own stats, levels, and skills. The wonderful thing about them is that they’ll continue working in the background whenever you’re playing. With minimal effort, you can have an entire workforce gathering materials and resources for you, even when you’re AFK. Not only will they gather items for you, but you can also task them to create goods too. It’s a really great system that can bring a lot of rewards. But, like everything in BDO, it’s not straightforward. Hiring workers and setting them to work on a Node is easy enough. But understanding the mechanics that drive speeds, skills, and levels isn’t quite so simple.
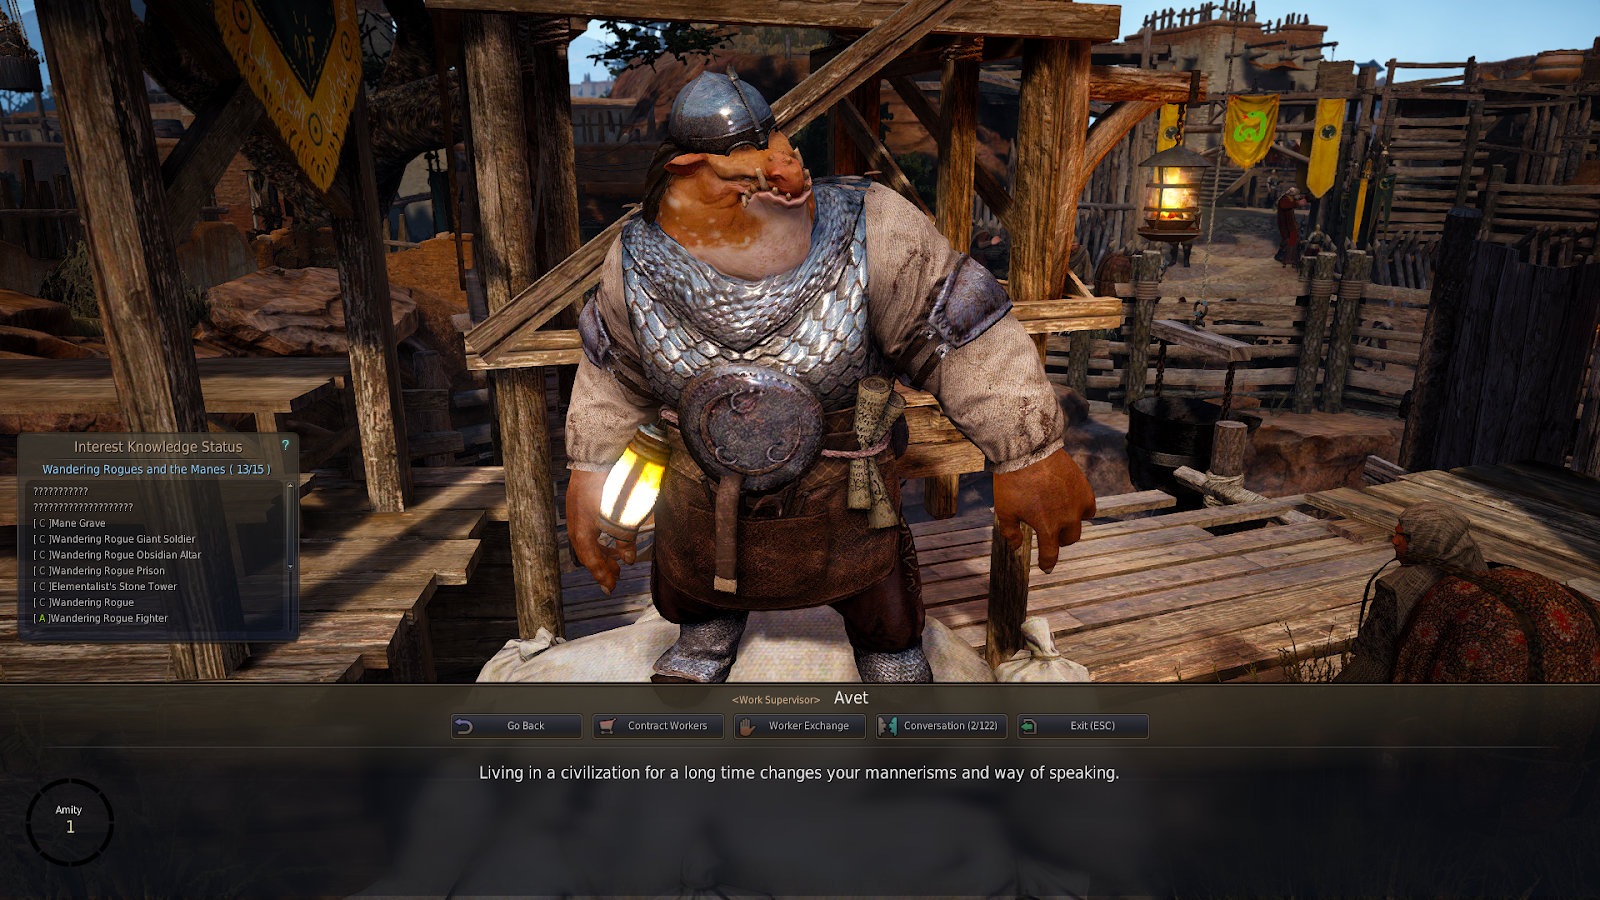
Workers are hired from the Work Supervisor NPCs found in towns and cities.
Despite its intricacies, it’s a good idea to start hiring workers and gathering resources as soon as you possibly can. We’ll cover this in detail further down, but essentially once your workers are working, you can continue accumulating assets. This is particularly useful for when you reach the higher levels and want to start leveling up skills and crafting items. It’s essential for making large amounts of money. The sooner you start, the quicker you’ll get rich. Below we’ve covered everything you need to know about workers. Again, each point could be a full essay unto itself, but I’ll try and just cover the essentials for now. By the time we’re done, you’ll be able to hire workers, set them working, keep them happy, and level them up.
How to Use Nodes and Workers
You can’t get the most out of your Node investments without workers, and you can’t use workers unless you’ve first invested in Nodes. It’s therefore important to balance the number of workers you have with the number of Nodes you’re invested in.
Below are the key components to doing so:
Hiring Workers and Buying Lodging
Your first step is hiring a worker. Although there are other ways you can obtain workers, such as through questing, you’ll mainly be relying on the hiring system. To hire a worker, you first need to visit the Work Supervisor NPC in town. These can easily be found by using the NPC finder tool at the top right of your HUD. Once you arrive at the Supervisor, press ‘R’ to talk with them. They will have a dialogue option for ‘Contract Workers.’ It will cost you 5 energy points to view a worker. When you’re first starting out, any worker will do and will likely be of ‘Normal’ tier. However, if you want to find a specific race or skill level, you’ll have to gamble.
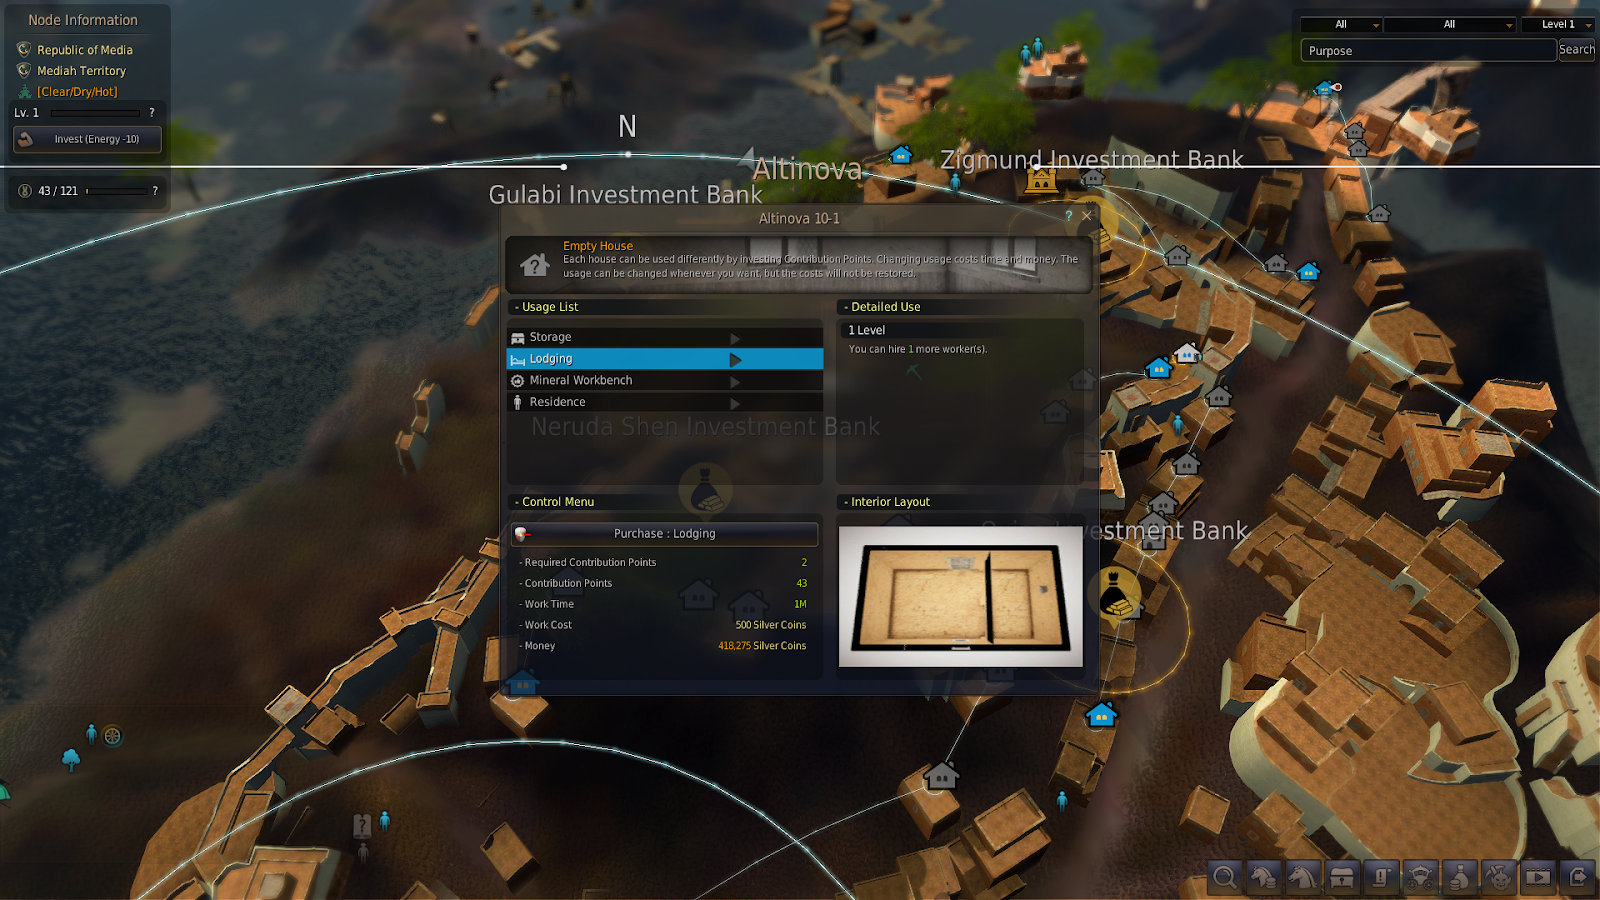
Workers need lodging in order to work on Nodes linked to the town.
Like much of Black Desert, hiring workers relies on a random number generator. Clicking ‘View Another’ will cost you another 5 energy and may or may not give you a better result. We’ll cover worker skills and races further down, but for now, you can hire a worker. You are given one free lodging slot per city or town, but if you want multiple workers, you’ll need multiple lodgings. So, if this is your first worker you can hire them, but if it’s an additional one, you’ll need to secure extra lodging.
Buying Lodging
Lodging is localized to the specific town or city you’re in. It’s easily gained through navigating the map, but again it’s not something that’s explained terribly well in the game. Open the map and click on the location you wish to add a worker. This will open the details of the area, including housing that’s available to purchase. Not all housing will be suitable for lodging, so you can use the filter to narrow down your results. It usually takes 1CP per worker to add lodging. However, some more expensive houses can lodge more than one worker.
How to Use Workers on Nodes
Now that you have some workers and a place to lodge them, you’ll want to get them to work. Thankfully this process isn’t too difficult, although once you start building your resource empire you’ll want to be a bit more strategic with your placements. Once you’ve uncovered some Nodes, you can click on them to find out whether they have any farmable resources. This could be grain, wood, metals, or other similar goods. To start with, it’s advisable to invest in some grain Nodes, as these come in particularly useful when keeping your workers’ energy levels up.
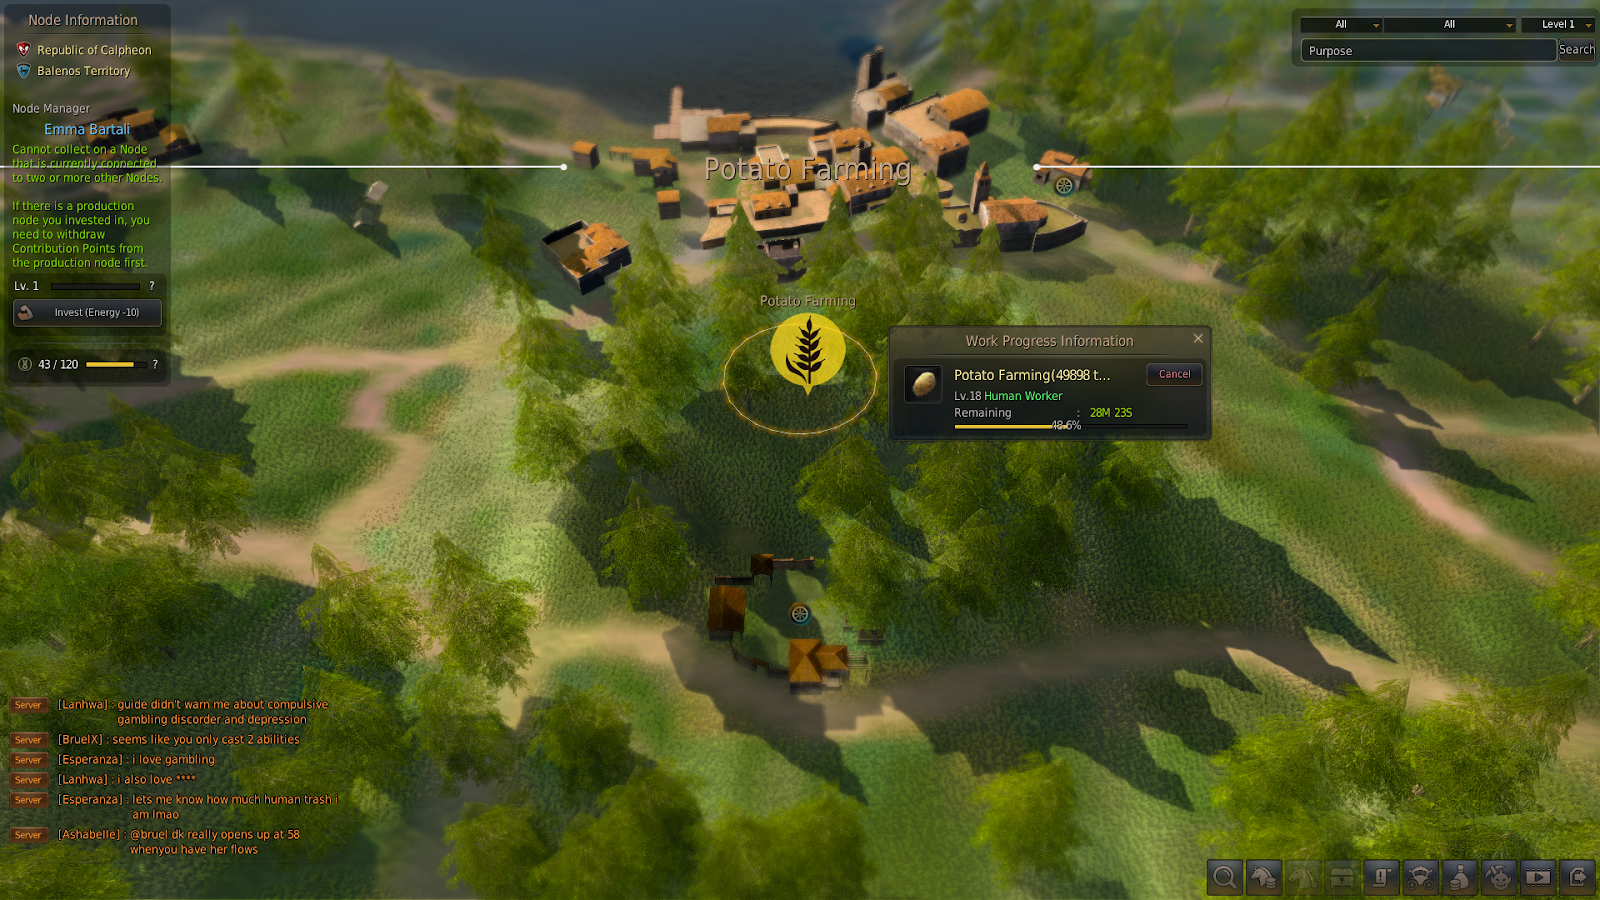
Grain or potato Nodes are a good first investment. The produce can be used to keep workers’ energy up.
Once you’ve invested CP in a Node and resource sub-Node, you can choose a worker to start gathering items from the land. Clicking on a resource Node will bring up a list of all the available workers you currently have. It will also give you details of the work that they will be doing, and how long one cycle of gathering will take. We’ll cover the stats in more detail later on, but essentially the higher level and better stats a worker has, the more efficiently they’ll be able to recover resources. By default, they will be set to work one cycle of work. This is useful if you only need a small amount of a material, but usually, you’ll want to change this. The maximum cycles you can set is 50,000, which means you can set them to work on a Node and largely forget about them.
Workers will continue to gather resources from their assigned Node, and you’ll find that the materials they gather will be stored in the town where their lodging is. You can assign a worker to be employed on an area far from their lodging area, but this will increase the distance they have to travel and increase the gathering time.
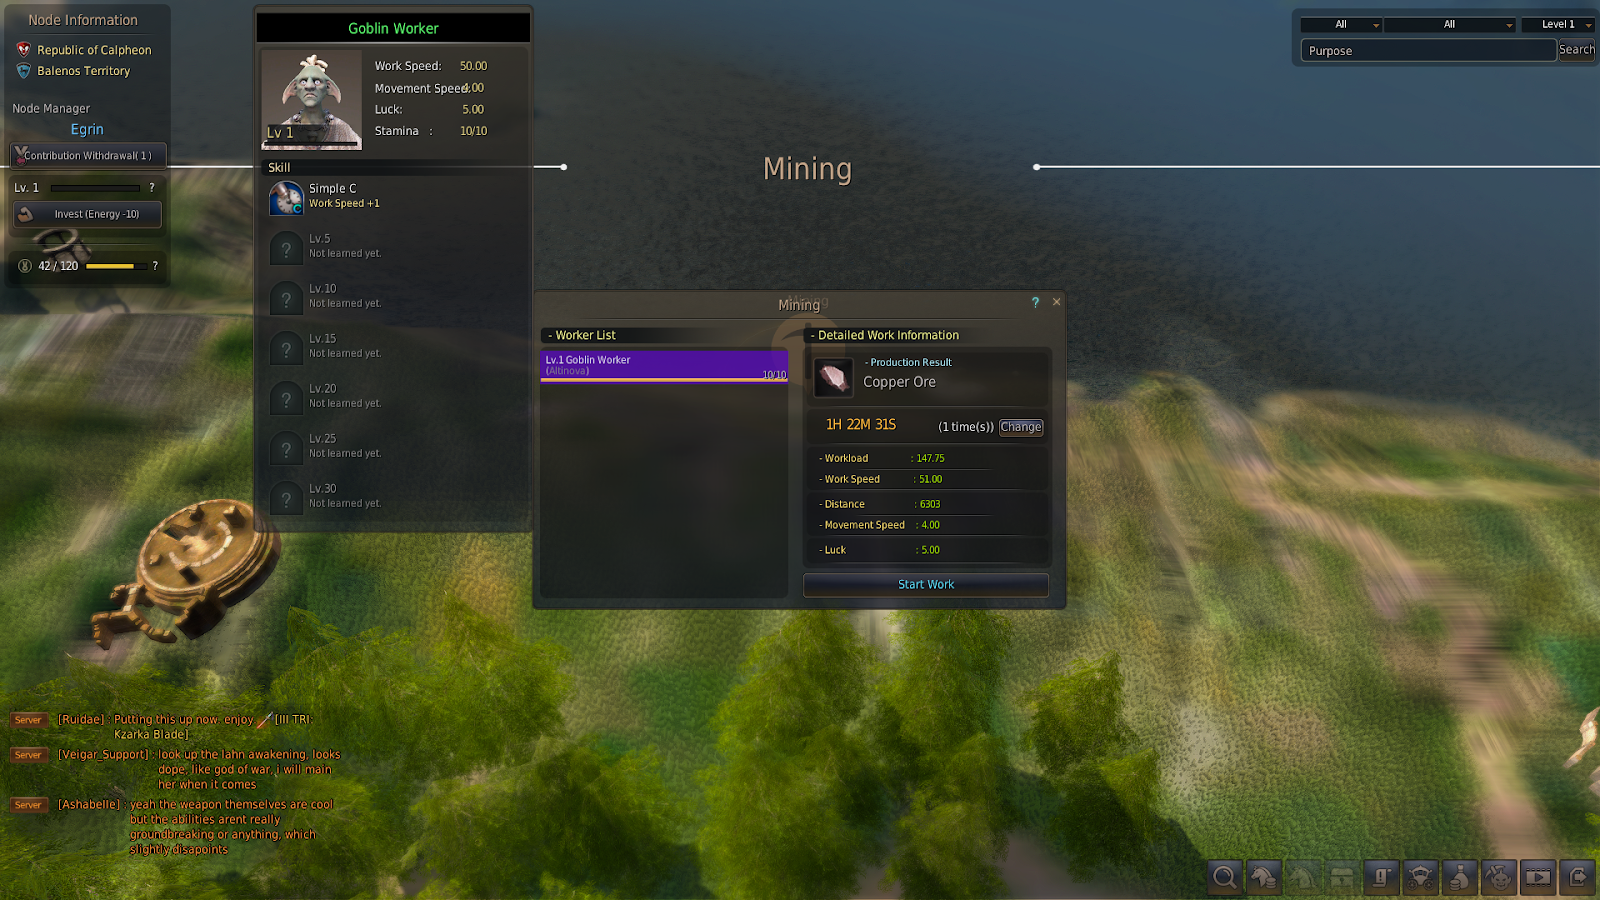
After investing CP into a Node, you can set one of your workers to work.
Worker Tiers
So, workers will spend their time gathering resources, all day every day as long as you’re online. But at what rate do they gather said resources? This is determined by their stats. We’ll cover these in the next section, but first, let’s look at tiers. In the same way that weapons and armor have tiers, workers are also tier-based.
There are five in total, and I’ve outlined each below:
-
Naïve. As the name suggests, there aren’t really very useful as workers. Their stats are pretty terrible, and it’s best to skip on these if you can. Take the 5 energy hit and view the next one.
-
Normal. This is standard worker level and the one you’re most likely to get. Sadly, their stats are also quite low compared to skilled workers. If you have enough energy, aim for a level above this.
-
Skilled. The gains you experience at this level are well worth the extra energy it takes to find them. Not only are their max-level stats more than adequate, but you can also sell them for a profit later on.
-
Professional. These are hard to come by but are incredibly useful if you’re building an empire. It depends on the luck of the draw, but if one comes up you should definitely hire them.
-
Artisan. As you’d expect, these are nearly impossible to obtain. The chances of you getting one from a Work Supervisor are minute, but you can level up a different worker to ensure you get some.

Workers have different tiers, represented by color and title.
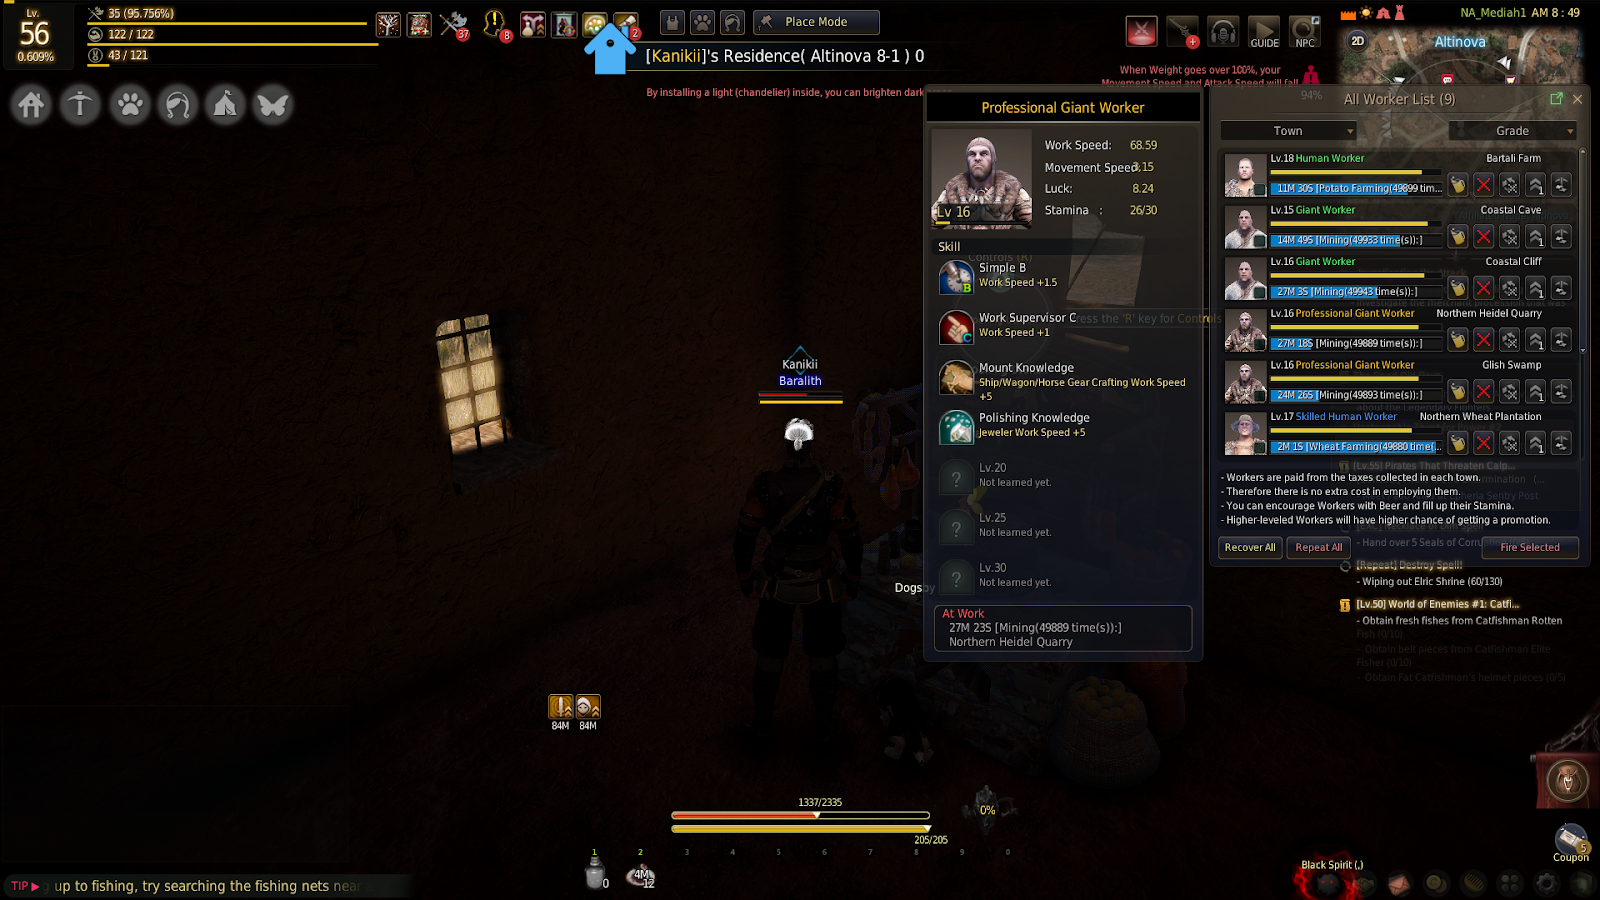
Worker Stats
So, with better tiers come better stats. But what are these stats? And how do they impact the rate at which your workers work?
Below we’ve covered the main stats and their impact on the game:
-
Work Speed. As you can probably guess, this determines how fast the processing goes. However, it’s slightly more complicated than that. When it comes to working Nodes, time is measured in ‘ticks.’ One tick represents 10 minutes. The Work Speed stat depends on the workload of a particular Node. This is the time it takes for a full cycle of resource gathering. To simplify, if a Workload on a Node is 200, and the assigned worker’s Speed is 100, it will take two ticks (20 minutes) to complete the gathering, with the addition of the distance calculation.
-
Movement Speed. This is particularly relevant depending on how far away Nodes are located from the city your worker is lodged in. The formula associated with movement time: Movement Time = Distance/Movement speed x 2. So to reduce movement time, place workers on Nodes that are close to towns and cities.
-
Luck. This is somewhat self-explanatory, but having a higher luck stat increases the chance of obtaining rare items from Nodes.
-
Stamina. This determines how long a worker can continue working for before you need to feed them.
So, when you’re hiring workers look to get the highest stats possible from the highest tier workers you can.
The Importance of Beer
Beer is an important part of life, at least in Black Desert Online. Workers need feeding, as when they work it drains their stamina. The different races, Goblin, Giant, and Human, have different levels of stamina, with goblins having the least amount. Completing a job, or one cycle of gathering costs 1 stamina point. Once their stamina is empty, they will stop working. Perhaps the cheapest way to feed your workers is by giving them beer. Thankfully, they’re happy enough to live on a diet consisting entirely of beer.
Above I mentioned that you should start your gathering activities by gathering grains. This is because it’s a key ingredient in beer. By gathering grains like wheat, barley, or potatoes, you can then purchase the remaining ingredients for relatively little silver.
The recipe for beer is below:
-
5 x Grains
-
6 x Mineral Water
-
1 x Sugar
-
2 x Leavening Agent
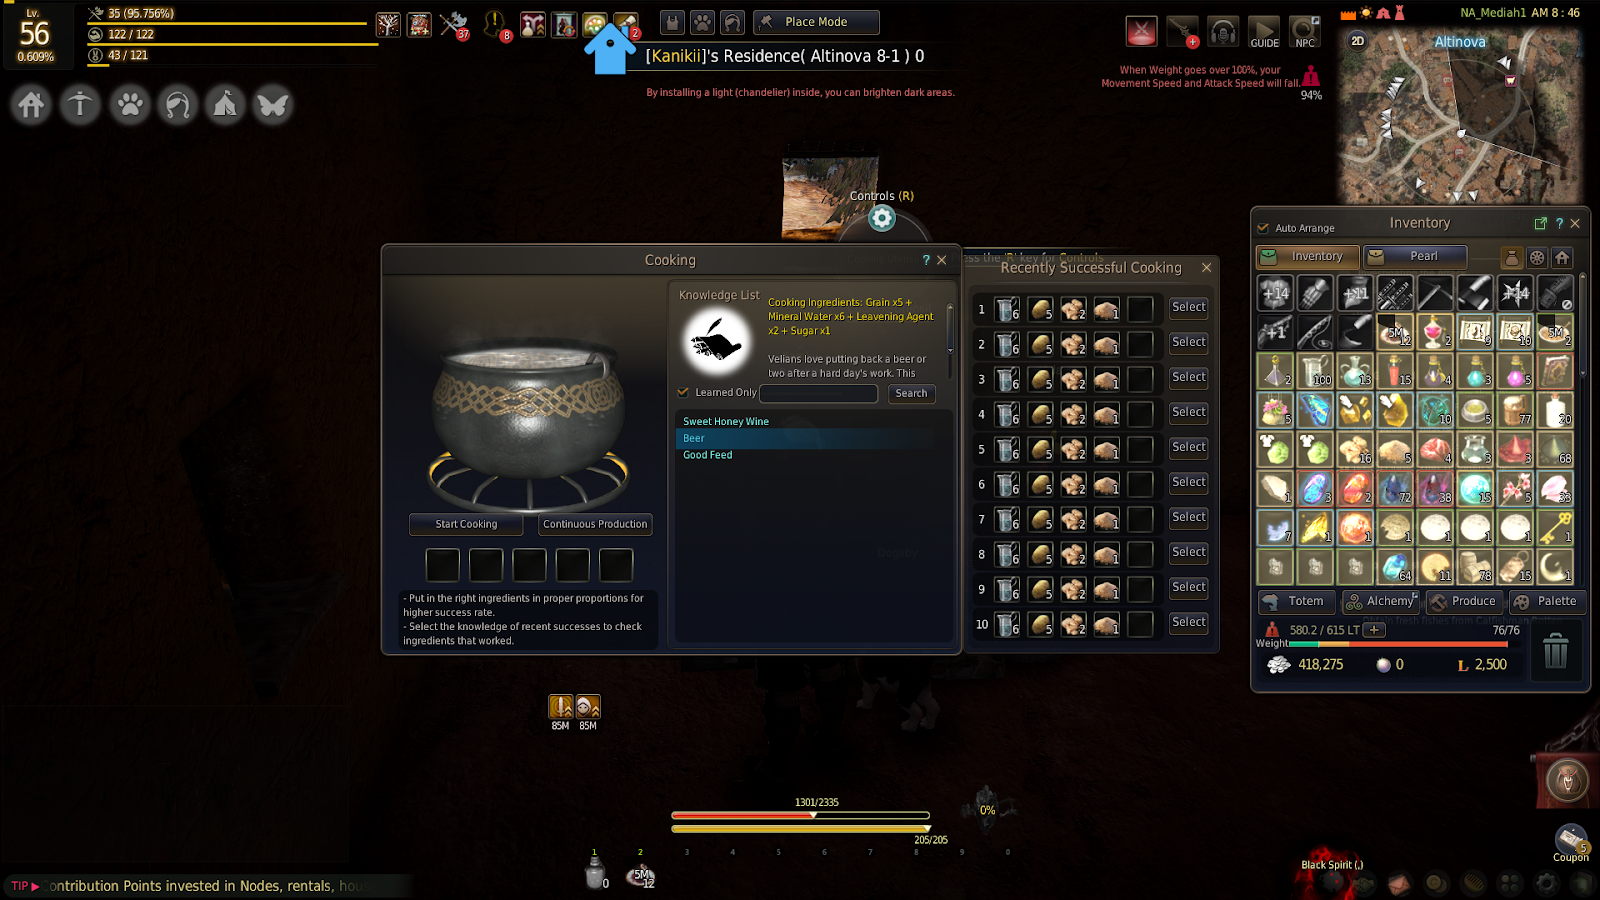
Making beer is an easy way to level up your cooking and keep your workers happy.
Other than the grains, you can purchase the ingredients from any cooking vendor. Once you have them, you’ll need to have a residence in a city or town (acquired in the same way as lodging) and a cooking utensil. You will then need to add the ingredients as outlined above. This process can be done in bulk whilst you’re AFK. Creating beer is an excellent way to level up your cooking skill and keep your workers working.
Worker Leveling and Skills
Much like your own character, your pets, and mounts, your workers can get EXP. This is acquired for every job cycle that they complete. The exact amount depends on how long the job took. When they have acquired enough experience, they will level up. This process happens automatically, and there’s not much you need to do in terms of management. However, it is possible for you to increase a worker’s tier. You are afforded three chances per worker, one for every 10 levels. Like much of the game, whether or not a worker goes up a tier is down to chance. It does seem that there’s a greater chance the higher level the worker is though. When a worker is promoted, they reset to level 1 of that tier.
Each worker starts with 1 skill, assigned randomly. They get one more skill every 5 levels, for a total of 7. There are a variety of buffs that you can get for your works, including increased movement speed, Node work speed, and luck. It is possible to change the skills a worker has once they reach level 30 with 50% of EXP. It’s definitely worth leveling your workers, as the more you do, the more benefit they will bring you. Once you have a fleet or Artisan Workers of high-level, you will have more resources than you know what to do with.
Workers have different skills that are learned every 5 levels at random.
Worker Exchange
One way to obtain high-level workers without having to train them yourself is through the Worker Exchange. This can be accessed via the Work Supervisor, and you can both buy and sell workers here. As with hiring a regular worker, you must have sufficient lodging and silver. The worker exchange varies in quality; there are a lot of cheap workers at the Skilled level, with some Professional workers that are out of promotion chances. Artisan workers are incredibly rare and usually very expensive. Often players will level Artisans to level 30 and sell them at a high price.
If you have maxed out the potential of one of your workers, you can sell them via the exchange too. However, you have to weigh up the time and resources you’ve put into leveling a worker to determine whether it’s worth it for you. Also be aware that the Worker Exchange will take a percentage of the sale price, meaning that you’ll get less than you sell it for.
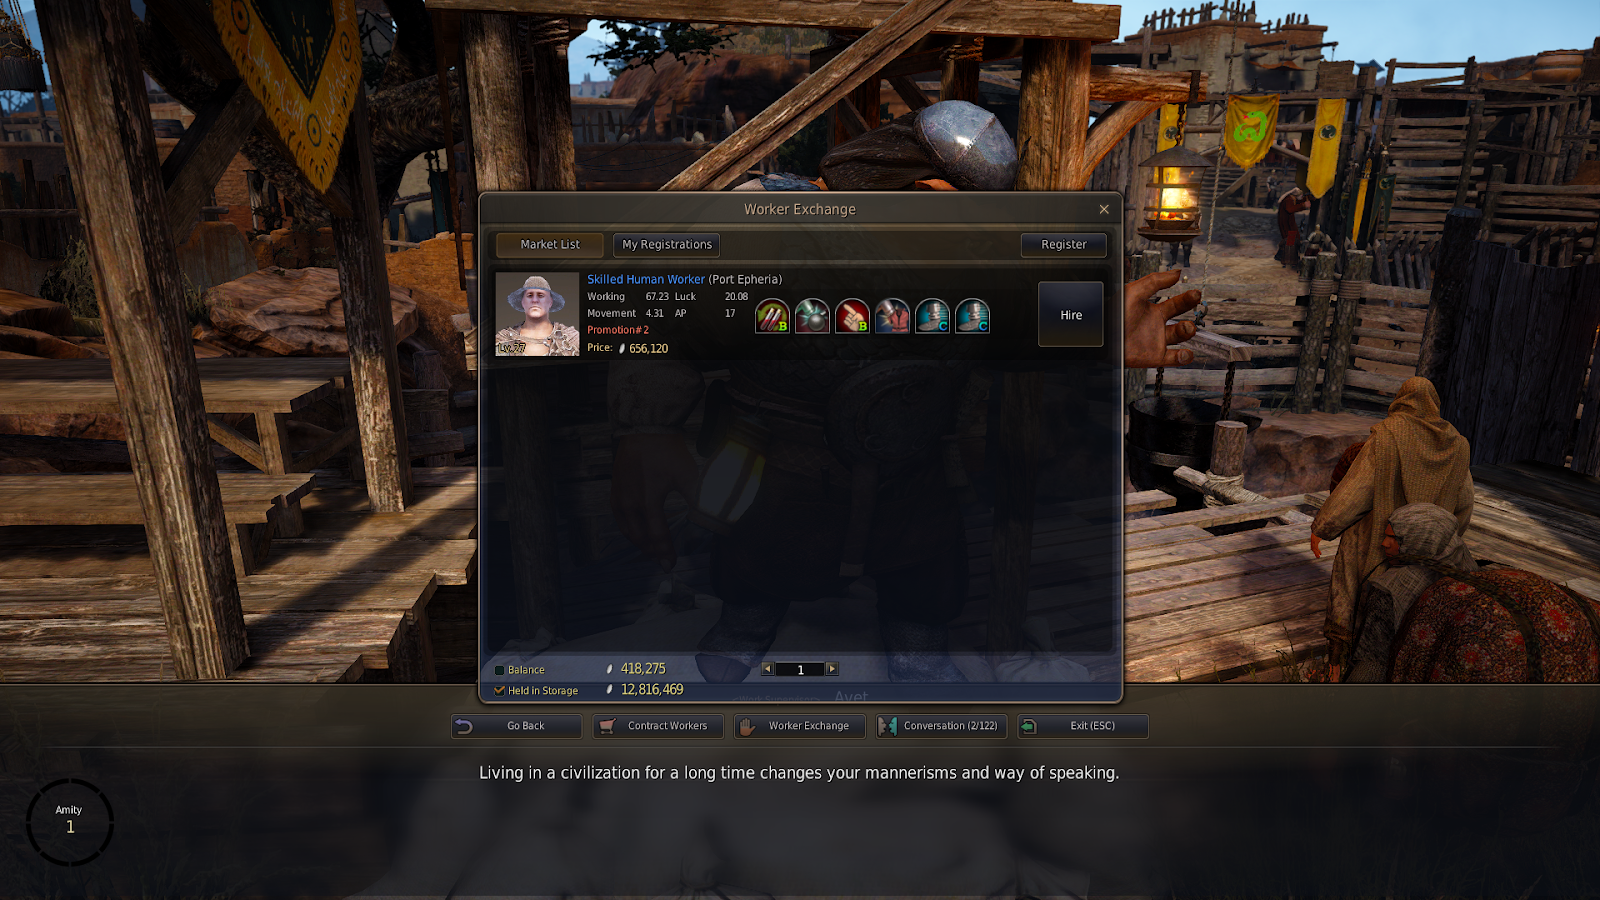
The worker exchange lets you buy and sell workers that are already leveled up.
How to Use Workers Effectively
When you’re assembling your worker empire, it’s important to consider how you play. This will determine what kinds of workers you’ll want to hire. For example, if you spend a lot of time AFK with the game running, Giants might be a good choice. Their high stamina means they can continue working for long periods without you having to feed them. If you’re fairly attentive to the game, Goblins are fast workers and can gather resources at a good rate. They do need a lot of attention though, or else their stamina will deplete, and they’ll stop working. Humans represent a good middle ground of the two.
When you’re making your Node empire, take into account where your Nodes are linked to. Although having a trade route is always a good idea, it could mean that farming more isolated Nodes takes a lot more time. In these instances, faster workers may be preferable. Promoting your workers should be done at level 20 or above. Any lower and you risk them failing and wasting a promotion chance. Waiting until level 30 is an option, but it takes a very long time. Aim for level 25 and if it fails, start again with a new worker. It will be quicker doing this than waiting for the 25-30 leveling.
Black Desert Online Nodes and Workers Summary
Hopefully, you’re now ready to start your own Node and worker empire. We’ve covered how the two are linked, and can’t function without investment in the other. Workers on production Nodes are an excellent source of passive income and give you great opportunities to level life skills through processing the gathered materials. The workers themselves have different races, levels, skills, and tiers. The higher their stats are, the better and more productive they will be. However, getting a worker to the top tier and level takes a lot of time.
Each worker has their own stamina level, which will deplete as they complete work cycles. Using farmed grains to create beer is an excellent way to feed your workforce. As you get more CP, you will be able to invest in more Nodes, hire more workers, and expand your trade empire. Happy farming!